How Do I Display Images on a Webpage
(feat. img Tag)
Today's Contents
• If an image file to be imported into the html document is located (saved) in the same hierarchy as the html document file you are currently writing
• If an image file to be imported into the html document is located (saved) in the different hierarchy as the html document file you are currently writing
Hello, Radiant Guys! How are you? Wow, It is a bit chilly, so I'm drinking warm water in a pretty teacup. It's a really thankful moment. The warmth from the teacup comes to my mind. How grateful I am! What is the weather like where you are staying? Isn't it chilly outside there?
Today, I'd like to talk about how to place an image on a webpage using HTML. The tag that will be the main character in today's post is <img> tag. It stands for 'image'. It is used to embed an image on a HTML page. The usage is not that difficult, but there are a few things to be careful of.
First, there is a case where an image file you want to embed is stored in the same hierarchy as the location of the html document file you are currently coding, and second, there is a case where the saved locations of the two files are in different hierarchies. In each case, you need to apply a different writing in a code editor. So, let's take a closer look.
| If They Are in the Same Hierarchy
· Open Visual Studio Code: Other types of coding programs are also fine.
· Create a new file. I named it imgTag.html in the previously created folder, TESTHTML: I have already created a folder named TESTHTML on my desktop. I hope you do along. See Image1.
 |
| [Image1. Creating a new imgTag.html file in the TESTHTML folder] |
· In the editor of the imgTag.html document, let's use the shortcut key. That is the 'exclamation mark + tab key' on your keyboard to automatically create the basic HTML document structure.
· Keep in mind Where you are currently writing the html document and where the image you want to fetch is located.
· First, bring an image file that you'd embed to the web into the folder named TESTHTML. If the image is on the desktop, you can drag and drop it into the TESTHTML folder. I fetched an image file named heart.jpg from the desktop. See Image2.
· And create a new folder named img in the TESTHTML folder. I had created the folder, TESTHTML, on my desktop. So I did this process on the desktop. See Image3.
 |
| [Image3. Creating a new folder 'img' in the folder 'testHTML'] |
· And let's fetch an image you'd like to embed into the 'img' folder. I brought an image file tea.jpg into the 'img' folder: You can also just bring in the image you want. In this way, two images were prepared in total.
As for <img> tag, it doesn't have a closing tag (called empty tag), and it contains two required attributes only: src specifying the path to the image, and alt specifying an alternative text for web accessibility.
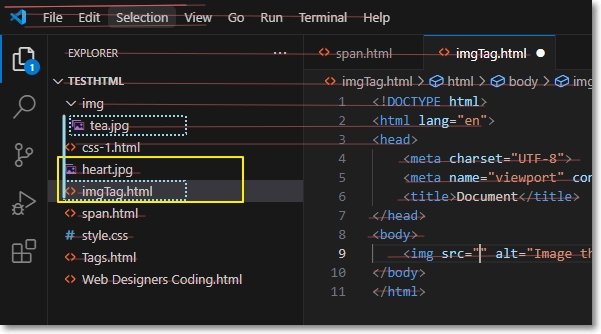
· The box below is an example of entering the <img> tag for understanging. Back to the code editor, let's load the heart.jpg image file between body tags. As you can see in Image4, the imgTag.html file that is currently being written and heart.jpg file are in the same hierarchy under the TESTHTML folder. In this case, enter the <img> tag as in the box below.
How to type an <img> Tag
<Tag Attribute1="Value" Attribute2="Alternative text"/> |
| [Image4. Two files with the same hierarchy in one folder] |
When entering the <img> tag in HTML, the slash (/) at the end is to easily recognize the closing of the <img> tag. Originally, it is an empty tag that does not have a closing tag, so there is no problem displaying the image on the webpage even if this slash is not entered.
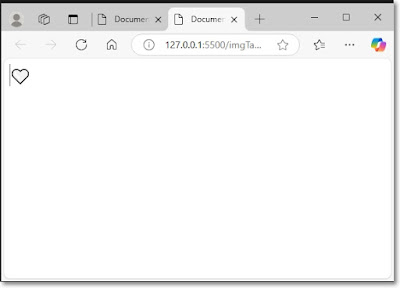
· What I carried out in a code editor and the image displayed on the webpage are shown in the box and image5 below.
Example of applying <img> tag
<body><img src="heart.jpg" alt="Image that shows a white heart"/>
</body>
 |
| [Image5. Image displayed on the webpage through <img> tag] |
| If They Are in the Different Hierarchy
· This time, let's bring in another image, tea.jpg. If you look at the left side of the editor, there are TESTHTML folder > img folder > tea.jpg file. Unlike the heart.jpg file, the current HTML document and the tea.jpg file have different hierarchies about the saved locations. See Image6 below. In this case, <img> tag is written as shown in the box below.
 |
| [Image6. Different hierarchies between heart.jpg and tea.jpg regarding the html document that I'm currently working on] |
· As the box below shows, write a value for the attribute src. The first value is img. It is the 'folder name' where the desired image is saved. Once you type in it, then enter 'slash (/)' and straight 'file name'. The slash (/) here implies 'go to the folder typed in just before the slash'. Then, the attribute, alt follows. This is an essential element for ensuring web accessibility for the visually impaired.
· The image carried out through the <img> tag on the webpage is shown in Image6.
Example of applying <img> tag
<body><img src="img/tea.jpg" alt="Image shows a steaming teacup"/>
</body>
· The image expressed via the tag <img> on a webpage is displayed in Image7.
 |
| [Image7. An image on a webpage expressed via <img> tag] |
· Congratulations! We've made it all. If you follow it step by step, it's not that hard, right? Always take care of your body and mind, and I'll see you next time, Radiant Guys!

